Needles on Deck: A Designer’s Stitch Test for Real Projects
When I first opened the Needles on Deck digital embroidery file, I had a very specific project in mind. A friend who teaches sewing classes had asked for a custom needle keeper cushion that would sit beside her machine and keep every needle type visible and organized. The playful name of this design immediately told me it would be the focal point, and I was curious whether the stitched result would hold up to daily handling, constant needle insertion, and the critical eye of a seasoned sewer. This review shares how that test turned out and what any maker or small business owner should realistically expect before adding this design to a finished product.
First Impressions of the Needles on Deck Design
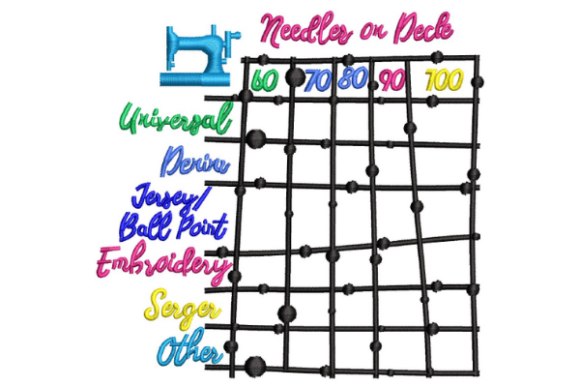
The motif carries a cheerful, workshop-ready personality that leans into the pun without feeling forced. The lettering is the main actor—clean, slightly whimsical, with just enough negative space between characters to promise legibility even at smaller hoop sizes. Scattered around the text are tiny needle-shaped accents, and I noticed the designer used a balance of satin stitch outlines and solid fill stitch bodies for those needles. That decision matters more than many crafters realize, because it controls how light hits the thread on a finished cushion or tote bag and whether the small pointy ends read clearly from arm’s length.
Even before loading the hoop, I could picture Needles on Deck working on a linen blend cushion cover, a zippered pouch, or a canvas apron meant for a sewing studio. The mood is helpful rather than overly cute—practical enough for a commercial embroidery client who wants their handmade product to look intentional, not just decorative. The layout feels classic enough to fit a rectangular or circular hoop without awkward cropping, though naturally you will want to check your chosen hoop size against the file dimensions before committing.
Where This Embroidery Design Shines in Real Life
I tested Needles on Deck on a midweight cotton-linen cushion panel meant to hold rows of needles slipped under horizontal straps. The design sat centered above the straps, becoming the header of the whole organizer. The satin-stitch letters stitched out with tight, even coverage, and the tiny needle icons did not lose definition under eight to ten passes of thread. For craft business owners selling sewing-themed gifts, this is exactly the kind of detail that raises a product above a generic print.
Beyond my needle keeper cushion, I see this design translating effortlessly into several real-life embroidery project formats:
- Tote bag design: Stitch it onto the front pocket of a natural canvas tote and pair it with a loop for scissors. It becomes an instant sewing-class companion.
- Handmade product lining: Inside a roll-up organizer, the motif acts like a gentle label that makes the gift feel custom.
- Apron or smock: On the chest of a sewing apron, the lettering stays readable when the wearer is standing at a cutting table.
- Embroidered patch: Stitch on felt with a tight satin border, and you have a sew-on patch for jackets, project bags, or quilting totes.
- Sweatshirt embroidery: A left-chest placement on a cozy sweatshirt would surprise sewing enthusiasts during cooler craft fair seasons.
The strong theme connection makes it a smart digital embroidery file for Etsy sellers who want to list a downloaded design that solves a real problem rather than just looking pretty. Customers who search for “sewing room decor” or “needle organizer cushion template” will instantly connect with the name.
Choosing the Right Fabric and Stabilizer
Fabric texture can make or break a design with small lettering and slender needle shapes. During my test, I found that tightly woven cotton and linen blends gave the cleanest result. On a looser weave like osnaburg, the tiny needle points started to sink into the texture, losing a bit of sharpness. If you plan to use this on a tea towel or a loosely woven blanket, consider a water-soluble topper to keep those fine details crisp.
Stretchy fabric requires extra caution. I tested a sample on a cotton-spandex jersey headband, and while the satin stitches held, the fill-stitch areas showed slight puckering even with a medium-weight cutaway stabilizer. If you intend to place Needles on Deck on baby clothes or fitted T-shirts, I recommend hooping firmly, using a fusible mesh stabilizer, and running a tension test piece first. For caps, the curved surface could distort the horizontal lettering unless you use a cap embroidery hoop and proper digitizing adjustments—so always verify whether the file is optimized for curved hat embroidery if that’s your plan.
Dark fabric brings its own challenge. On navy denim, white thread for the lettering looked bold and professional, but the tiny needle icons almost disappeared when I used a medium gray thread. The fix is simple: test your thread colors on the actual fabric, not just in a digital preview. A high-contrast palette keeps the design readable for buyers who will be staring at the cushion while searching for their machine needles.
Stitching Notes from My Test Run
I ran the design at a moderate speed, around 600 stitches per minute, on a single-needle machine. The file I received included clearly separated color stops, which made thread changes painless even for the multi-color version. I noticed the lettering had a stitch density that felt appropriate for daily use—the satin columns were full without becoming so dense that the needle perforated lightweight fabric.
Still, there are a few practical tips any maker should follow before declaring the design production-ready:
- Test on a scrap of the exact fabric and stabilizer combo you will sell or gift. Even a 5% difference in density can change how the final product looks after washing.
- Check color contrast in black-and-white to confirm the design remains legible. Buyers with visual impairments or those glancing across a sewing room need the lettering to stand out fast.
- If the design file includes small decorative elements like needle eyes or thread dashes, inspect them under magnification after the first stitch-out. A single misplaced thread jump can blur a tiny detail.
- Confirm the hoop size listed matches your machine’s capabilities. A large cushion project may require multi-hooping or repositioning, so plan your stabilizer and basting accordingly.
- Always verify the licensing terms. The file description for Needles on Deck says it comes with the machine embroidery template, but you need to check whether commercial use is allowed for selling finished physical items, digital product resale, or both.
Commercial Use and Selling Finished Products
If you are a craft business owner, Etsy seller, or boutique shop creator, Needles on Deck offers strong potential as a featured design on a limited product line. I can already see a coordinated set: a needle cushion, a matching scissor pouch, and a thread-catcher bin, all stitched with the same motif. Because the theme is niche yet widely understood, it grabs a buyer who walks past a craft fair table and immediately thinks, “I know someone who needs that.” That recognition matters more than splashy graphics for personalized gift sales.
From a branding perspective, this design keeps your small shop merchandise looking intentional. When a customer unwraps a cushion and sees crisp satin stitches naming its exact purpose, it raises their trust in your handmade product quality. I would not hesitate to use it as a hero image in a shop listing or a printable mockup to show variations on different background colors.
However, commercial embroidery also means volume, and volume means consistency. Make sure you can replicate the first stitch-out’s quality across twenty cushions without hoop burn or thread breakage. That may mean slowing the machine slightly, switching to a premium polyester thread, or using a slightly denser cutaway stabilizer for the fill areas. A small adjustment upfront saves hours of rejected inventory later.
When to Use Needles on Deck With Extra Care
While the design is forgiving on sturdy substrates, there are projects where I’d approach it more cautiously. Thin fabrics like a lightweight baby clothes onesie can ripple under the satin lettering columns if you don’t float a heavy stabilizer underneath. Tight corners on a tiny zipper pouch may crowd the needle motifs if the design isn’t scaled down properly—always check stitch count reduction before shrinking beyond 80% of the original size. And if you are decorating a curved surface like a cap or a thick pillow cover seam, be mindful that the horizontal line of text will follow the contour. You may want to add a slight arc to the design in your editing software, but only after confirming the original file’s stitch angles can handle a gentle rotation.
Items that go through frequent washing, such as kitchen towels or lunch bags, need a thread that resists fading and a secure backing knot. I tend to place a soft lining behind the embroidery to protect the backside from catching on needles stored in the cushion—an extra step that makes the final product feel thoroughly considered.
Final Observations Before You Stitch
Needles on Deck is one of those rare embroidery designs where the concept and the stitched outcome align. It doesn’t overpromise with a complex scene that turns muddy in thread; instead, it delivers an honest, readable label that serves a real function. For me, that’s what separates a digital asset from a practical design asset you can depend on project after project.
If you are planning a sewing-themed product for a holiday gift, a boutique drop, or a how-to workshop sample, this motif earns its spot in your hoop. Just give yourself time to test it on the exact materials your customer will touch, check the licensing so you sell without worry, and play with thread palettes until the contrast feels effortless. That small investment of time turns a cute embroidery file into a finished piece that someone will genuinely use to keep their sewing machine needles safe, visible, and charmingly organized.